Today SparkFun released the LilyPad ProtoSnap Plus, a new offering in the LilyPad system that I was the product manager and lead developer on. Our team has been working on this project for most of the year and we are very proud of this one! It is also the 10 year anniversary of the LilyPad ecosystem, and to celebrate SparkFun has launched a new LilyPad portal to guide users through the product line and inspire them to create with sewable circuits.

Project: WiFi Sensing Bracelet Hack
Last week I found some WiFi Detecting Keychains on sale for $5 and decided they would make a fun weekend hack. I personally don’t like keychain gadgets, but they are great for incorporating into wearable projects because of how small and compact the circuit boards are. Here is a short video of it in action before I took it apart: http://www.flickr.com/apps/video/stewart.swf?v=71377
The LED at the bottom is red and only lights up when there is no signal. The row of LEDs above indicates signal strength. If you hold the button down an LED at the top acts as a flashlight.


After opening up the casing, I found that the board was nice and compact. At first I thought I would be able to desolder the LEDs and arrange them in a new configuration on a bracelet, but they ended up being too small for my current soldering set up and skill set. For now, I am just focusing incorporating the board and it’s current function into a wearable bracelet.

I soldered some wires to the battery terminals and switch so that I can create soft battery holders and a soft switch. Then I cut out a piece of neoprene with holes to embed the board and batteries in. This gives the bracelet a bit of cushion for the components and keeps everything at a consistent thickness. I placed some conductive fabric and thread to act as battery terminals, and sewed a simple pouch to hold them in place. Finally, some metal snaps connected to the batteries will act as a power switch so that it is only on when the bracelet is being worn.

Unfortunately, during my prototyping/experimenting process, I left the batteries in and one of the loose wires shorted out the board. However, I ordered a second keychain just in case I had any accidents, so I will be trying again soon. The dead board gives me an opportunity to try and get those tiny LEDs off and brainstorm a better design for the final version.
Fun with Drawdio!
This week I purchased the Drawdio Fun Pack from Adafruit to play with and spent Saturday night stitching it into a quick prototype. I brought it to today’s NH Media Makers meet-up and it was a big hit!

Originally it was going to be a strange hat, but I couldn’t get a good connection with my conductive fabric to my forehead, so it morphed into a little hand puppet. I soldered some snaps onto the Drawdio board’s contacts so I could detach it from the fabric jellyfish/squid creature. Inspired by the ‘Unruly,’ a project from Makezine that uses resistors and pennies to make a little keyboard, I used conductive fabric patches and resistors to make musical tentacles. They also snap on/off for easy prototyping and I’m going to add different resistor values to make a variety of pitches/scales. Here’s a quick video, it still needs a few finishing touches, but it is fun to play around with so far.
There are lots of things I’d like to try with this method, and hopefully I’ll have some time in the future to refine the design and make an Instructable out of it. There are a few more pics of the building process over at my flickr account.
Soft Circuit Kits Round-Up
When I first got interested in soft circuits, getting materials was a combination of ordering free samples and sourcing items on your own. Luckily in the last few years things have changed and there are a variety of kits available to get you started with e-sewing. Back in December, Becky @Craftzine did a nice Holiday Gift Guide for getting started in wearables that included some must-have items like conductive thread, a multimeter, and the LilyPad Arduino. I’ve decided to gather up info on some LED sewing kits that I’ve found so you can pick the one that suits you best. Scroll down for a chart comparing them w/ details on what’s included in each individual kit.
StitchLits

Image via KateHartman.com
Kate Hartman offers the StitchLits LED Sewing Kit on her Etsy store. It is a nice little set to get you started with sewing LEDs, I especially like the way it is packaged in a little tin. There is even a needle and needle threader included so you can literally get started as soon as you open the package!
SternLab LED Sewing Kit

Image via Sternlab.org
Becky Stern’s kit is available at the Makers Market and her Etsy shop. Another nice starter kit, she also includes your choice of colors for the LEDs (red, green, blue, white, or yellow). Becky has a great video tutorial on using the kit for those of us who like to watch, rather than read, instructions. She also has a downloadable pattern if you’d like to use the design she demos.
Aniomagic’s Beginning & Intermediate Kits
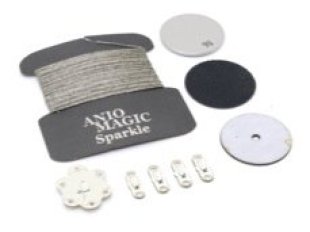
Images via Aniomagic.com
Aniomagic has lots of great little modules for creating interactive and electronic crafts. I like how they divided the kits into levels, a very basic beginner kit and then an intermediate kit with some more goodies. And the packing is so much fun! (Can you tell I’m a sucker for great product packaging?) Again, lots of good tutorials and ideas can be found at this site, as well as a great shopping experience.
LilyPad E-Sewing Kit

Images via Sparkfun
Comparison Chart
| Name | Where to Buy | Price | Conductive Thread | LEDs | Battery | Battery Holder* | Extras | Instructions |
| Aniomagic Beginner’s Sewing Kit | Aniomagic | $5.00 | ~2 yds | (1) LED Sequin | (1) 12.5 mm CR1216 coin cell | Fabric Battery Holder | n/a | Beginner Kit |
| Aniomagic Intermediate Sewing Kit | Aniomagic | $15.00 | ~3 yds | (2) LED Sequins | (1) 12.5 mm CR1216 coin cell | Fabric Battery Holder | Fabric Push Switch, Tilt Switch, 3x4in Fabric Swatch | Intermediate Kit |
| SternLab LED Sewing Kit | MakerShed Etsy | $15.00 | 2 1/3 yds (7ft) | (2) 5mmColor: Red, green, blue, white, or yellow (your choice) | (1) 20mm CR2032 coin cell | Coin Cell Holder | Snap | LED Sewing Tutorials |
| StitchLits | Etsy | $20.00 | 3 yds | (3) LED Sequins Color: White | (1) 20mm CR2032 coin cell | Coin Cell Holder | Needle, Needle Threader, Snap | How to Sew StitchLits Instructable |
| LilyPad E-Sewing Kit | Sparkfun MakerShed | $49.35 $39.95 | 75 yds (1 spool) | (5) LilyPad LEDsColor: Bright White | (2) 20mm CR2032 coin cell | Coin Cell Holder | (3) LilyPad Button Boards |
Project: Embedded Musical Toys
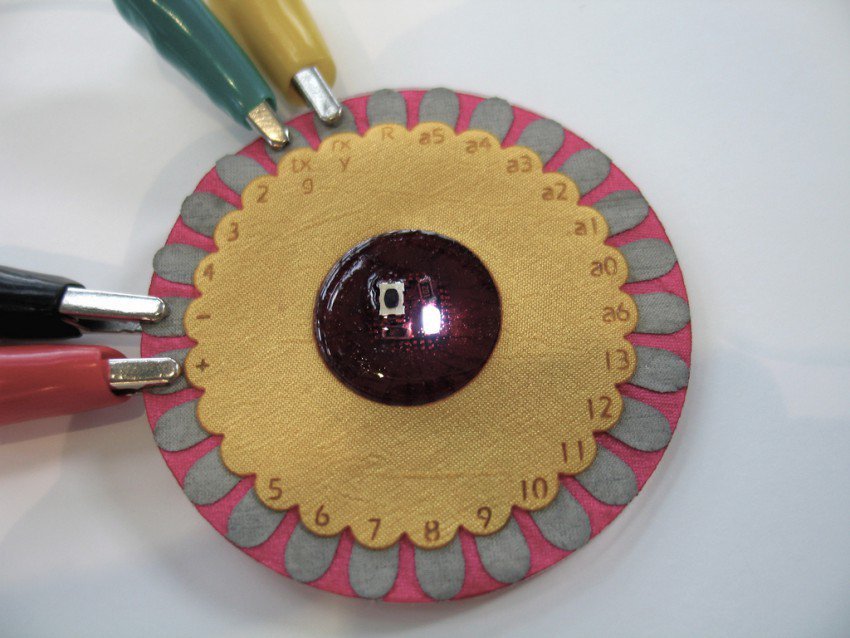
Today my partner and I were at a thrift store and found some great little electronic instruments in the toys section. Thrift stores are one of my favorite places to go for inspiration and great hackable finds. He was looking for some interesting sound-making objects to use in an album he’s creating with his band Winterstar for this year’s RPM Challenge and found this awesome keytar:
I fell in love with this little musical toy because of the LED matrix in the center. I love tearing apart toys and gadgets to play with them (I had fun using an RC car as the basis for my Tween Voodoo project).
Over on Instructables there are a couple cool little projects using toy pianos bykobakant. Hacking and reconstructing these toys for a new interaction is a great learning exercise – so I’m going to try it out for myself. I don’t do a lot with sound in my projects so I think it will be a fun exploration.

Wearable Piano Interface (via Instructables)
Though the guts of my toy are a little bulky for a wearable interface, I think it’d be interesting in a pillow or maybe even as part of aslipcover for our couch. Unfortunately I am without a soldering iron at the moment for the fun stuff, but in the meantime I am pulling this thing apart and watching Ask an Engineer Live Chat from Adafruit Industries.
LilyPad Arduino

LilyPad Arduino system image by Leah Buechley (via Flickr)
Before the LilyPad, if you wanted to incorporate a microcontroller into fabric projects you either had to create your own socket or hide a breadboard somewhere in the piece. When I was working with Rebecca on our REACTIVEfashion project, we used Arduino Minis on tiny breadboards hidden in pockets, sleeves, and purses.
The LilyPad evolved from Leah Buechley’s experiments with fabric PCBs. Her handmade, flexible fabric PCBs were absolutely stunning, but not easily mass-produced. She collaborated with SparkFun Electronics to create the LilyPad Arduino hardware which has been available for sale since October 2007. The LilyPad now comes as a kit with a variety of sewable modules such as LEDs, sensors, and battery holders. Leah has an introduction to the LilyPad on her site which walks you through the programming interface and set up if you are new to Arduino.
LilyPad prototype image by Leah Buechley (via Flickr)
Right now I have the main board, usb adapter, an LED module, AAA battery board (though it is a bit bulky for my tastes), and a temperature sensor. My favorite module so far has to be the LiPower, which is enables you to incorporate a rechargable Lithium Polymer battery into your LilyPad project. Can’t wait to order more of the accessories and play!
Here are some tutorials and projects using the Lilypad:
- LilyPad projects on Instructables
- Craftzine’s Color Changing LED Brooch (uses a LilyPad LED module, not the main board)
- LilyPad 101 video from Craftzine
The LilyPad also has it’s own Flickr group – a great place to check out what other people are doing with it.