Getting Ready For World Maker Faire New York

I’m happy to announce that Soft Circuit Saturdays will be at the first World Maker Faire in New York next month! This will be my 3rd time attending a Maker Faire event, and the first time I will be participating in one of the ‘big’ faires with a booth and projects to share. It’s going to be an amazingexperience to be in the midst of so many people – I’m very excited!

I will be bringing a few things I shared atCambridge Mini Maker Faire, along with some new pieces. I’ve decided to make sure that most of the projects that I bring along will have tutorials and DIY instructions available either on this site, Instructables, or Make:Projects. That means I’ll be spending the next few weekends putting together how-tos, getting everything prepped for the faire, and finalizing my travel plans. Instead of my weekly posts of projects and builds, I will be posting links to interesting projects I find on my Facebook page, and possibly publishing a round-up or two along the way.

I have a few friends who will be traveling with me to help document the faire and the other soft circuit projects and makers that will be there, so stay tuned for photos and videos in the weeks after the event.

Here are the projects I’m bringing (so far):

  • Drawdio Puppet
  • LED Jellies
  • Talking Sock Puppets
  • LilyPad Pillow

Check out all my tutorials over on Make: Projects to learn how to make your own versions of these pieces.

Exploring Make: Projects

A few weeks ago, Makezine & Craftzine introduced a new DIY platform called Make: Projects. Soon after the site launched, I jumped right in and started posting some of my project tutorials and playing around with the system.

MakeProjectsSite.jpg


Make: Projects is a living library for makers, a how-to community hosted by MAKE magazine! Here you can build something from our growing cookbook of projects, tweak existing projects to improve them, share your own step-by-step instructions, discover new ideas and techniques, and learn how to make just about anything. And it’s a wiki, so everything is hackable. Connect with the collective smarts of the maker community!

Interface and Features

When you create a new guide, it is broken into three sections that you edit separately:

  • General Guide Data – input a title, choose a category for your guide, intro text, and a one line summary (that displays when browsing projects).
  • Meta Data – display approximate time & difficulty of the project, prerequisites, and list the tools/materials needed.
  • Steps - the ‘meat’ of the guide, where step-by-step instructions and images go.

Tools Database

A really cool feature of the platform is the tools and material database in the Meta Data section of the guide editor. As you start typing a tool into the box, the database searches for it and you can choose from a drop down list. If the tool you input is not in the list, it gets added to the database, building a larger collection of relevant materials.

Template

The steps pages are created in a specific template, broken down into bullet points with icons that can be added for notes or reminders. This forces you to keep the steps short and to the point. As I was inputting tutorials I had previously published on Instructables, this constraint helped me clarify and condense instructions and make them easier to follow.

Images

One of my favorite aspects of the platform is the image tray. A pop up at the bottom of the screen, you can upload a bunch of images and drag and drop them into different sections of your guide. Once you use the image it is removed from the tray, but can be dragged back into it for rearranging.

Make: Projects vs Instructables

So how does the Make: Projects platform compare with the well known Instructables? It is hard to compare them side-by-side as they are essentially about different things. Make: Projects appears to be more of a library of tutorials introduced in Makezine and Craftzine, with the ability for users to contribute their own projects. It has more of a database/magazine feel and is for browsing, editing, and using as a reference. The strength of Instructables lies in its community and social emphasis on making. There are forums, comments, and ratings systems to help bring the most useful or engaging content to the forefront. One major difference to note is that on Make: Projects everything must be licensed underCreative Commons BY-NC-SA, while Instructables has the option of all Creative Commons licenses. I don’t favor one over the other and publish my tutorials on both to reach different audiences. It will be interesting to see how the two sites interact with each other.

Make: Projects

Pros:

  • Standardized formatting keeps an easy to read and cohesive look/feel to the content.
  • Wiki-based editing allows for guides to be continually improved upon.
  • Curated platform helps eliminate duplicates and keeps a higher standard of projects.

Cons:

  • Only 3 images allowed per step.
  • No option to embed video (yet).
  • Some users may find Wiki formatting/syntax confusing

Instructables

Pros:

  • Thriving community adds a social aspect to the tutorials, commenting, contests and badges encourage interaction between users.
  • Tagging, keywords, ratings, favorites and subscription options to organize your own priorities andenable dynamic browsing through related tutorials.
  • Ability to add notes to images.

Cons:

  • Lots of ads can make interface crowded unless you purchase an upgraded account.
  • No rules in place for formatting or image resolution – content/quality can be hit or miss.

Click the image below to check out my author page on Make: Projects and view some of my tutorials.

[all images via Make: Projects]

Arduino Decor

This summer I’ve spent a lot of time reorganizing my workroom/office space. After getting all my tools in order and rearranging furniture, the last step has been to add inspiring art and decoration. Awhile back I had the idea to make big, squishy pillows shaped like Arduino boards, inspired by Blythe Church’s amazing hand sewn felt electronics. In my spare time, I’ve been working on a large LilyPad floor pillow. It ended up being a great way to practice my stitching and adds a much-needed soft element to the space (which right now is mostly desks and tables). After many hours of embroidering and hand stitching onto felt, I finally finished it up this afternoon. Here are a few pictures of the finished piece:


That’s the actual LilyPad board on the right.

The pillow is about 20″ in diameter and 3.5″ thick, with some memory foam inside to make it really squishy/huggable. I’m hoping to make some more in the shape of the other Arduino boards and have a whole collection of them around the workroom.

DIY Tech Footwear Round-Up

Lately there are an increasing number of shoes on the market that incorporate technology, from running shoes that sync with your iPod to high fashion illuminated heels. Here are a few cool tutorials that show you how to build your own tech-infused footwear.

Light Up and Glowing Shoes

DIY Flashing Shoes

Image via Instructables

Image via Instructables

This Instructable shows you how to repurpose the electronics from a pair of kid’s light up shoes and put them into your favorite pair of sneakers.

LED Shoes

Image via Instructables

Image via Instructables

Another pair of LED shoes, this tutorial has you build the circuit from scratch using conductive thread, LED sequin beads and puff paint (for insulation and decoration). Metal snaps in the tongue creates an on/off switch.

Rodarte Style Light Up Heels

Image via I Heart Switch

Image via I Heart Switch

Alison Lewis of I Heart Switch shows you how to achieve a look inspired by Rodarte’s high fashion light up heels.

El Wire Shoes

http://blip.tv/play/gfkN7cpIAg

Diana Eng’s book Fashion Geek has a project that uses electroluminescent wire instead of LEDs to add some glow to your footwear.

Sound

Get Smart Shoe Phone

Image via Instructables

Image via Instructables

Honestly, who doesn’t want to make a shoe phone? Instructables member gardners has a series of Get Smart projects that look like a lot of fun. This one uses a mobile phone and bluetooth headset.

Beat Sneaks: Musical MIDI Shoes

Using force sensitive resistors and an Arduino, these cool sneakers translate your toe-tapping into triggers for sounds.

Motion/Other Interactions

Power Laces: The Auto Lacing Shoe

I love these ‘Back to the Future’ inspired sneakers that have been getting a lot of press lately. Great use of a servo and zip ties!

Joy Slippers

Image via Instructables

Image via Instructables

Hannah Perner-Wilson’s tutorial uses conductive fabrics to make analog pressure sensors in custom slippers. These can then act as controllers for a drawing program in the Processing environment.

Power Generating Shoe

Image via Instructables

Image via Instructables

This project hacks parts of a crank flashlight and places them in the heel of the shoe for a boost of power when you walk.

For more reading on technology in footwear check out:

Project: ‘Talking’ Sock Puppet

Today I made a sock puppet that makes sound when you open its mouth. I used one of those greeting cards that plays sounds when you open it, some felt, and plastic buttons. It was a quick project for a rainy day and is a great way to use up old cards. I’d like to make another version with a card that you can record your own sound into. It would be fun to place the record button in the puppet’s ear and maybe have some light up eyes too. Visit Make: Projects for the full tutorial.

More Maker Faire Pictures

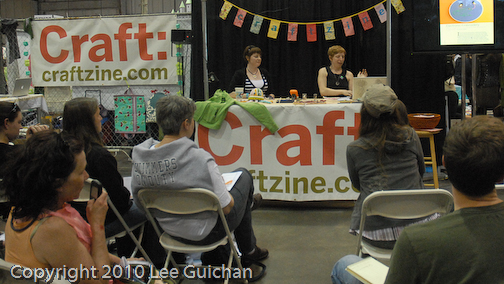
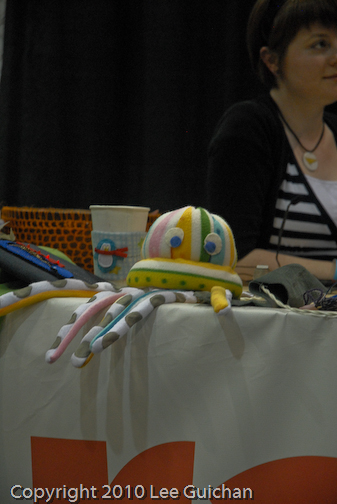
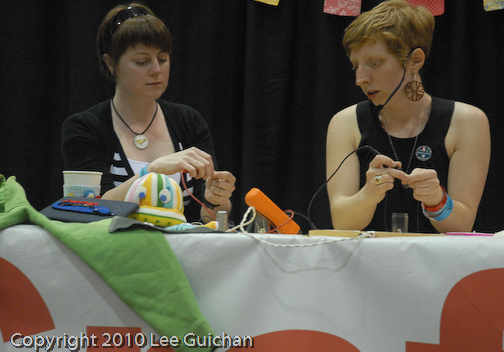
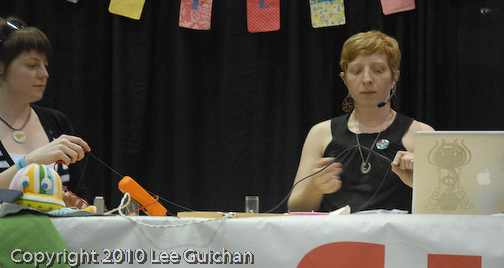
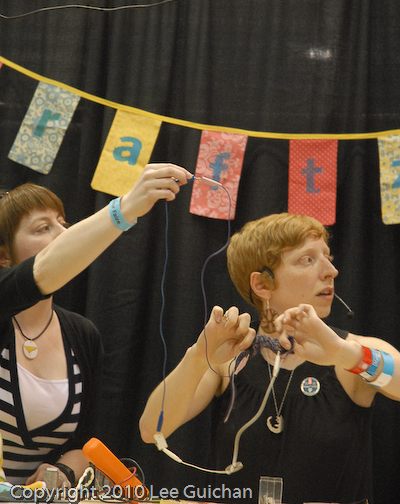
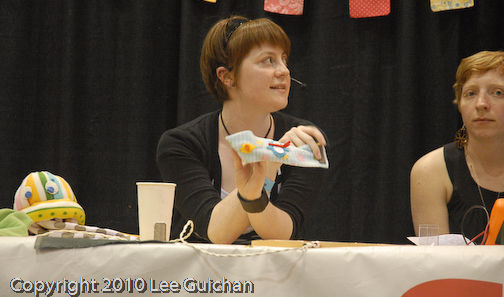
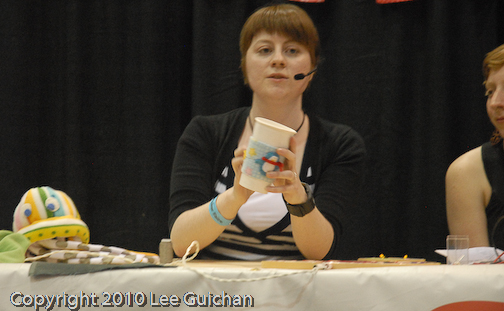
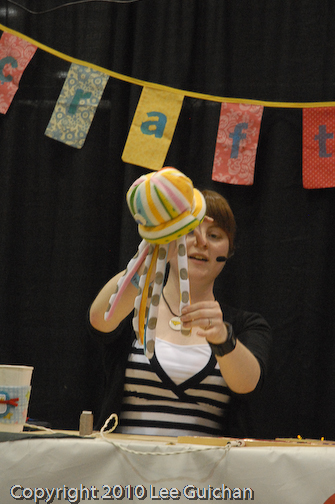
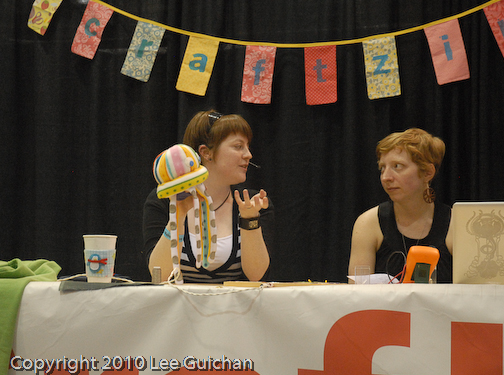
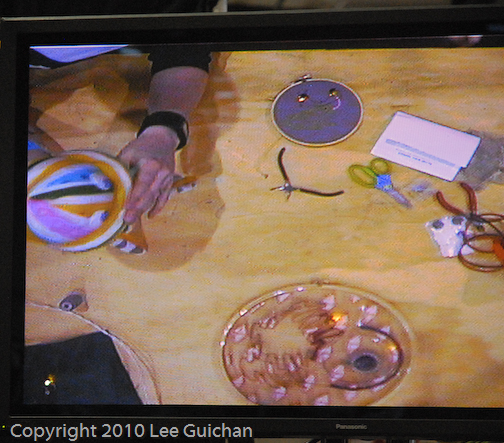
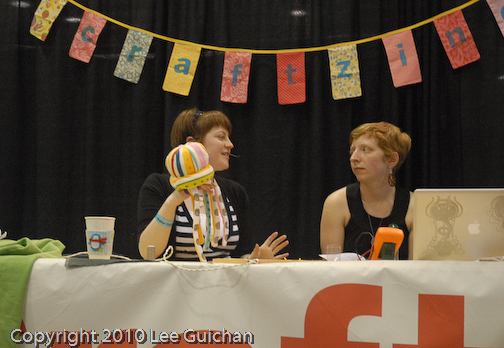
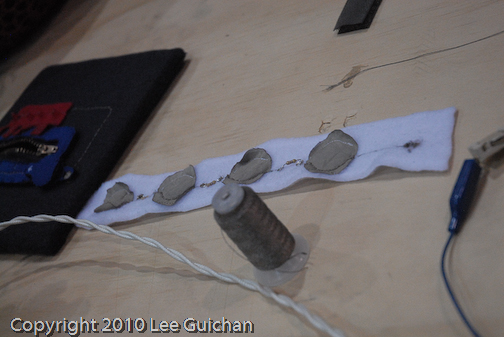
I recently received an email from Lee Guichan, who attended the Soft Electronics Demo at the Craftzine booth during Maker Faire. Lee sent some great images of Becky and me presenting soft circuit techniques to share on the blog.

All images courtesy of Lee Guichan.

Bio:

Guichan, Lee Guichan is based in San Francisco, CA.

Photographing special events and editorial. Has photographed local and known personalities such as super models. Freelancing since 1990, Lee’s photographs have been published in local and national magazines, and used both for editorial as well as advertising purposes. Participation with an artist at the De Young Museum, San Francisco in a visual photo essay.

Lee’s goal is to capture the main action of the moment and the subjects’ expressions, approaching events in a photo journalistic manner.

Maker Faire 2010 Recap

This week I’ve been transitioning back to the ‘real world’ after spending the weekend in California and experiencing two full days of Maker Faire. There were so many amazing projects and demos, I was only able to catch a few of them, but what I did see was fantastic. I focused mostly on the soft circuits and wearables side of the event, but was able to catch a lot of other wonderful projects, shows, and happenings as well. Here are a few highlights (with more video coming soon!):

E-Textile: A Wearable Computing Fashion Show

From left to right: Skirt Full of Stars by Shannon Henry, LED vest by Erik Johnson, GER: Galvanic Extimacy Responder by Kristin Neidlinger, Soft Electric Capelet and Sessile Handbag by Grace Kim

From left to right: Skirt Full of Stars by Shannon Henry, LED vest by Erik Johnson, GER: Galvanic Extimacy Responder by Kristin Neidlinger, Soft Electric Capelet and Sessile Handbag by Grace Kim

The e-textile show was a hit, showcasing some projects involving lights, sensors, and augmented clothing. I snapped a couple of pictures after the show; these are only a few of the projects that walked the runway. I had a great spot in which to view the show, but unfortunately, a large garage door was open directly behind the stage. The light pollution kept those of us in the audience from the full experience of the light up projects. ArtFuture was able to capture a good video of the show and they will be uploading interviews with the designers this week.

Anti/Surveillance Fashion Show

On Sunday, a different kind of wearables show hit the runway – this one based around either evading or inviting surveillance. I really enjoyed the thematic element and the creative ways the designers thought to affect surveillance methods such as cameras, face recognition software, and even watermarking on currency.

eTextile Electronics Materials and Portable Lab w/ Adrian Freed

Adrian Freed gave a great presentation on e-textile materials, sourcing, and applications. He showed a few of his own pieces that involved using e-textiles as musical controllers and introduced his portable lab (which he was even able to bring on an airplane). I was able to capture most of it on video (aside from a few minutes of the question and answer session at the end).

Part 1:
https://blip.tv/play/AYHknBIC

Part 2:
https://web.archive.org/web/20110908062609oe_/http://blip.tv/play/AYHknHUC

Intro to Soft Electronics

Helping Becky out with her Craft demo. More pics here.

Helping Becky out with her Craft demo. More pics here.

Becky Stern’s demo of electronic embroidery was a lot of fun. I was able to act as an extra set of hands for her while showing the audience how to sew with conductive thread, and passed things around to the crowd to check out. I brought a couple of my projects along with me to add to Becky’s soft circuit examples. Below are a couple of video excerpts (the whole demo was about 45 minutes long).

Working on the electronic embroidery example: http://blip.tv/play/AYHixWIC

Showing examples of soft circuit projects and sensors: http://blip.tv/play/AYHixjIC

Meeting the Makers

Nwanua from Aniomagic shows me the Soft Remote kit working with an iPhone

Nwanua from Aniomagic shows me the Soft Remote kit working with an iPhone

The best part of Maker Faire was talking with fellow makers and tinkerers who share my excitement for creating and experimenting. In addition to watching some fabulous demonstrations, I was also able to catch up with some soft circuit peers that inspire me and with whom I share projects through twitter, facebook, and flickr. Syuzi Pakhchyan of Fashioning Technology, Nwanua Elumeze of Aniomagic, Shannon Henry of Polymath Design Lab, and Lynne Bruning were some of the great people whom I finally got to meet in person.

Here are some more soft circuit/craft/sewing photos from the faire, and I have an album for the rest of Maker Faire over on flickr.

Countdown to Bay Area Maker Faire!

Today I started packing my bags for my first trip out to San Francisco. I’m flying out Wednesday to visit a friend, do a little sight-seeing, and check out the Bay Area Maker Faire. It’s going to be a ton of fun! I’ll be armed with my camera, a camcorder, and lots of energy as I visit as many booths/demos as possible and try and meet some of the makers who have been inspiring my own projects.

Here are a few of the things I plan on seeing:

Shows

E-Textile: A Wearable Computing Fashion Show
Lynne Bruning, textile enchantress and soft circuit superstar, has organized the Maker Faire’s first wearable computing fashion show. I’ll be there to see some of these pieces in person, and if time allows, meet and talk to a few of the designers.

Anti/Surveillance Fashion Show
Noisebridge, a San Francisco hackerspace, is also putting together a show called Anti/Surveillance “a runway show that explores the role of and our relationship with surveillance in our society.”

Demos

eTextile Electronics Materials and Portable Lab w/ Adrian Freed

Conductive Fabric: Methods and Materials w/ Lynne Bruning

Intro to Soft Electronics

Learn about crafty conductive materials and how you can integrate them into your projects! CRAFT Associate Editor Becky Stern with special guest Angela Sheehan will show lots examples of conductive thread embroidery, soft switches, and other craft-tech goodies.

Becky was kind enough to invite me to show a couple of my projects during her demo – I’ll be bringing the Musical Jellyfish and the Temperature Sensing Tea Sleeve as examples of crafting with electronics.

Maker Booths

The Bespoken: Wearable Adaptive Technology by Lynne Bruning
Skirt Full of Stars by Shannon Henry
Kimono Monsters by Sarah Din & PoChen Lin

And of course there are a ton of other non-soft circuit projects and demos happening that I will be scoping out as well. I won’t be making a post during the faire, but I will probably be posting a few pics on my Twitter. Stay tuned!

Why is Maker Faire so exciting? Check out this video from last year’s faire:

Paintable Electronics Workshop

Last weekend my friend Erin and I attended the first public workshop on paintable electronics/paper computing held by the High-Low Tech group at the MIT Museum. Part of the Cambridge Science Festival, it was a day-long (10am-5pm) demonstration and work session using conductive paints, batteries, and computing components to make interactive paper artworks. When I attended the TEI Conference back in January, I was able to play with the Electronic Popables project by Jie Qi; it is a truly phenomenal example of combining paper engineering/pop up techniques with electronic components and conductive materials. I was so excited to participate in this workshop and try my hand at this new way of combining craft and technology.

Electronic Popables via High-Low Tech

For the first part of the session, Leah Buechley and her graduate students Hannah Perner-Wilson, David Mellis, and Emily Lovell showed us some examples, including a paper piano, light-up flying spaghetti monster painting, and a piece of paper with a bend sensor built in that changed tones as you moved it.

We then used sticky notes to practice painting conductive paints and started to draw/paint a simple circuit with an LED in it. Getting used to working with the paint was tricky and it took awhile to dry, but after a little practice we were creating interesting designs. We then moved on to making switches and battery holders by painting the conductive paint on pieces of paper that we attached to parts of our circuits.


My first experiments with a painted circuit.
We glued down LEDs and literally painted the traces on top of the leads.

Testing out a circuit. Conductive paint under the brad allowed me to slide it and turn on a LED when I lined up the paths. You can see a few places where I was still learning to use the paint and it got a little messy. The white stickers under the LEDs covered some mistakes/spills that shorted out my lights.

https://www.flickr.com/photos/the_gella/4590345158/in/album-72157623977452522/
Here’s a video of Erin’s circuit, a mix of origami and drawing to make a lily pad design.

After lunch we were given kits that included LEDs, a speaker, a chip pre-programmed with some functions (fading/blinking lights, an input for a switch or sensor, and an output for a speaker) and made more complicated paper circuits. I kept mine simple with some lights, but there were some really creative and interesting results from other participants. Erin made an awesome jukebox that incorporated the painted traces beautifully.

https://www.flickr.com/photos/the_gella/4590345806/in/album-72157623977452522/

The participants were a mix of people who were interested in art, engineering, and science; a few had worked with sewing circuits and some had never worked with electronics at all. It was a lot of fun walking around and seeing all the different ways we used the components to make our projects. Leah and her students were really engaging and helpful and took the time to help each of us troubleshoot our circuits and offer advice and hints on working with the conductive paints.

I had a great time at the workshop and am hoping to purchase some of the paint we used and gather some friends to experiment with it at home. One problem that I was discussing with High-Low Tech student Emily Lovell was the fact that the paint oxidizes and you have to use it before it goes ‘bad’. Right now the paint is sold in fairly large quantities so I would have to do a lot of painting or find a lot of people to paint with me. Another issue was that the paint tended to separate, so the bottles we were using to apply the paint with needed to be shaken frequently or the traces would not work as well.

Working with electronics and paper made me realize how much improvisation goes into my soft circuit projects. Since the connections were painted, it meant I had to plan and sketch out my ideas in advance. Most of my sewing projects are pretty flexible/adaptable because I can take out a seam here or there, and thus I sort of make them up as I go along. It was an interesting exploration and I can’t wait to see more from the High-Low Tech as they develop the Teardrop paper computing kit and components further.

Here are some more pictures and videos:
http://www.flickr.com/apps/slideshow/show.swf?v=71649There are also some photos of the workshop on Hannah Perner-Wilson’s flickr account.

Weekends in Boston

Last weekend was the Cambridge Mini Maker Faire, which took place as part of the Cambridge Science Festival. A bunch of Boston-area makers were there to demo their projects and talk with the kids, families, and science-curious who came to the festival. I made the trek down from New Hampshire and spent the day hanging out and talking about my Soft Circuit Saturdays projects. Here are a few pictures from the event:

Photo by Chris Connors

Photo by Chris Connors

I brought an improved Drawdio Jellyfish Puppet

some LED Jellies (though with the bright day they were hard to see light up)

Temperature Sensing Tea Sleeve (not functioning for the faire, I didn’t want anyone getting burnt)

TeaSleeve.png

and the Soft Circuit Scrapbook (with some additional pages since last week’s post).

The visitors to my booth had fun interacting with the projects and they inspired some great conversations. I had a chance to talk to an aerial dancer who was working on incorporating a LilyPad and accelerometers into her performances. I also met a few teachers who work with kids and engineering, lots of parents who loved the idea of using technology with crafts, and kids who build their own electronic projects. A lot of people asked if I held workshops or classes. I don’t right now but I’d like to organize some, so that is now on my to-do list. I was even invited to a kick off party for a new community workspace/makerspace happening this weekend. I’m so glad for the opportunity to participate in a mini maker faire and I think I’m going to apply for the World Maker Faire in NYC this fall to meet even more makers.

The best part about the whole day was really the kids. Most of my projects aren’t necessarily made with kids in mind, they are more for my own explorations and play, but they were engaging and accessible to a younger audience as well. I think the only child who had interacted with my pieces before the faire was my younger sister. I was happy that the kids enjoyed visiting my booth and a lot of them knew some of the technologies or had kits with similar bits and pieces (such as the Drawdio).

You can check out more pictures from the Mini Maker Faire over at the Boston Maker Faire Flickr Pool.

This weekend I’m heading back down to Cambridge for another Science Festival Event with the High-Low Tech group at MIT. My friend and I signed up a few weeks ago but were waitlisted for the Paintable Electronics Workshop; I just got the news yesterday that there was a cancellation so we are in! It’s going to be a lot of fun and I will be blogging about it later on in the week.